Module 11: Configuring Remote Access and VPN in Microsoft Windows Server 2016/2019
Exploring New Protocols
Exploring new protocols involves evaluating emerging communication standards and technologies that enhance data transfer, security, scalability, and interoperability in modern IT networks and systems.
Examples of Emerging Protocols:
HTTP/3 (based on QUIC) – Faster and more secure web browsing
DNS over HTTPS (DoH) – Encrypts DNS queries for better privacy
Zero Trust Network Access (ZTNA) – Replaces traditional VPNs with identity-based access
gRPC – High-performance RPC framework used in microservices
WireGuard – Lightweight and secure VPN protocol
- Extensible Authentication Protocol (EAP)
- Allows for the Client and Server to Negotiate the Authentication Method That They Will Use
- Supports Authentication by Using:
- Ensures Support of Future Authentication Methods Through an API
- Generic token cards
- Generic token cards MD5-CHAP
- TLS
- Remote Authentication Dial-in User Service (RADIUS)
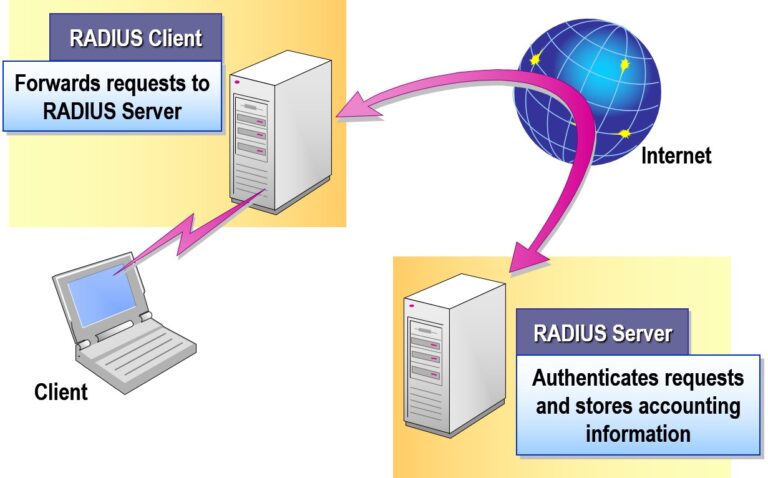
- Layer Two Tunneling Protocol (L2TP)
Function
Use to create an encrypted tunnel
Uses PPP
Requires IP-based transit internetwork
PPP encryption
IPSec encryption
Tunnel authentication
L2TP
X
X
X
X
PPTP
X
X
X
X
Optional
- Bandwidth Allocation Protocol (BAP)
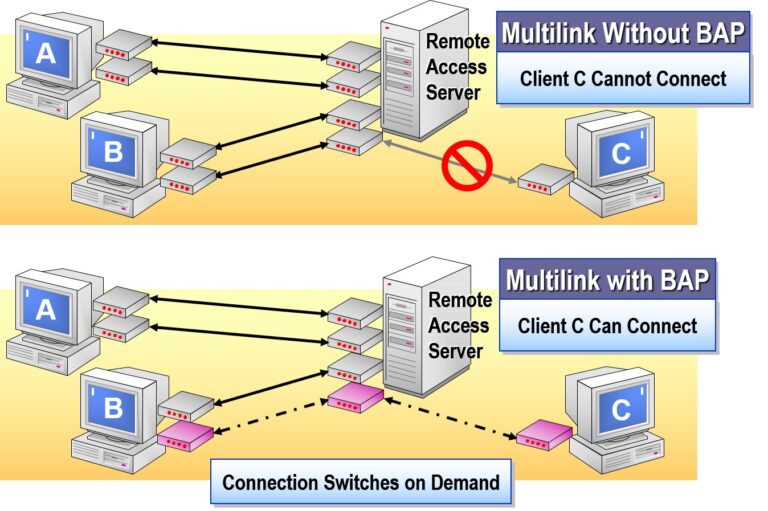
Configuring Outbound Connections
Configuring outbound connections refers to setting rules and policies that govern how internal systems or applications communicate with external networks or the internet.
Key Aspects:
Firewall Rules: Define what ports/protocols can be used to access the internet (e.g., HTTP, HTTPS, FTP).
Proxy Settings: Route outbound traffic through proxy servers for logging or filtering.
Access Control: Limit outbound access by user, group, IP, or application.
NAT (Network Address Translation): Converts internal private IPs to a public IP for internet communication.
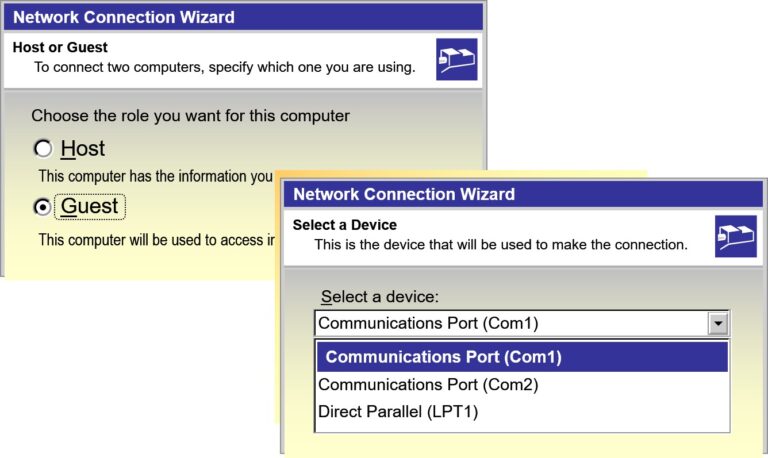
- Creating a Dial-up Connection
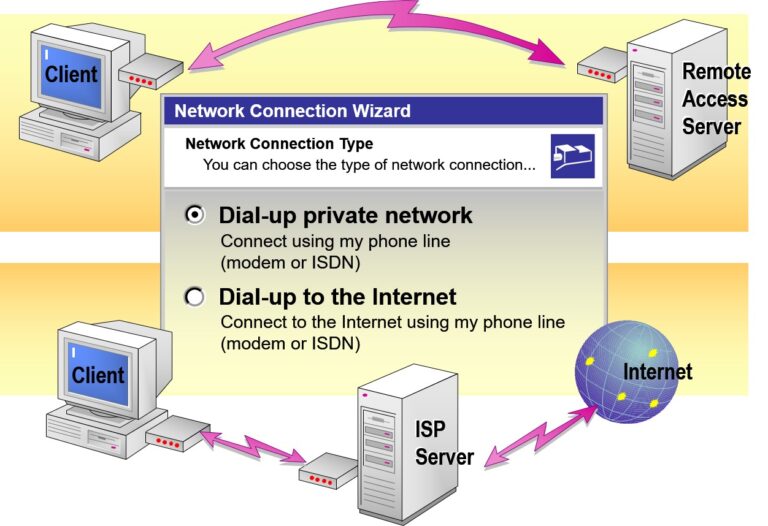
- Connecting to a Virtual Private Network
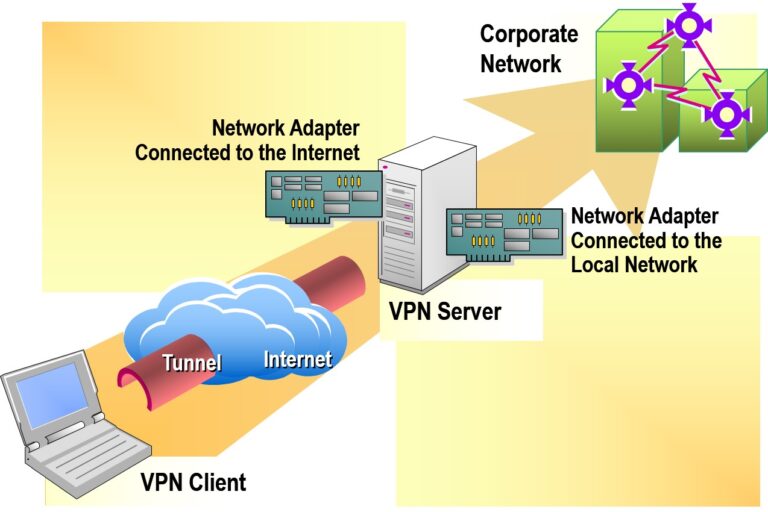
- Connecting Directly
Configuring Inbound Connections
Configuring inbound connections involves setting up rules and security controls that govern how external systems can access internal network resources or services.
Key Aspects:
Firewall Rules: Define what traffic from outside can enter (e.g., allow port 80 for a web server).
Port Forwarding: Direct specific incoming traffic to an internal device or service.
Access Control Lists (ACLs): Specify who (IP, user, device) is allowed or denied access.
DMZ (Demilitarized Zone): Hosts public-facing services while isolating the internal network.
VPN Configuration: Secure remote access to internal systems.
- Configuring an Internet Connection Server
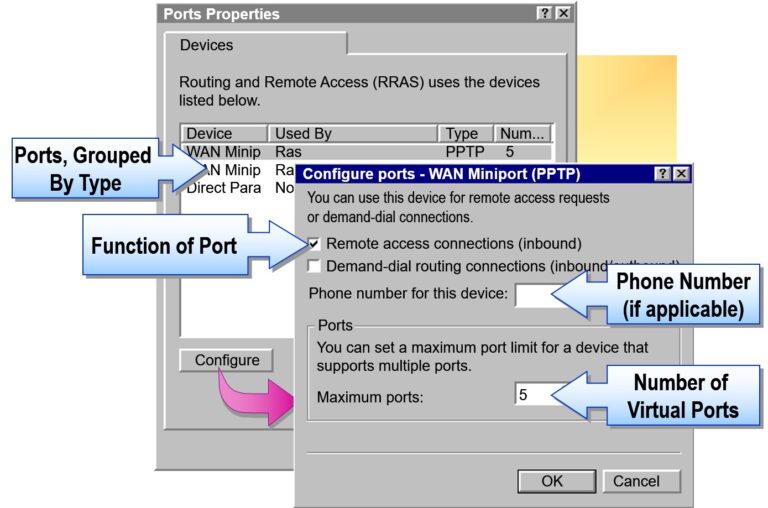
- Configuring a Remote Access Server
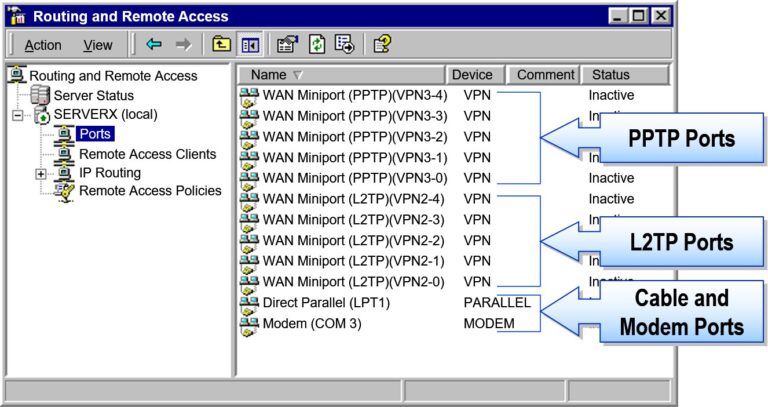
- Configuring a Virtual Private Network Server
Examining Remote Access Policies
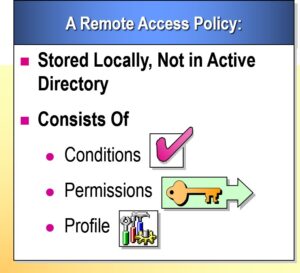
Remote Access Policies define the conditions and permissions under which users can connect to a network remotely, ensuring secure and controlled access to internal resources.
Key Elements:
User Permissions: Determines who is allowed remote access.
Authentication Methods: Passwords, certificates, smart cards, or multi-factor authentication (MFA).
Connection Conditions: Time of day, location, device compliance, or group membership.
Access Restrictions: Limit bandwidth, restrict applications, or enforce session timeouts.
Network Policy Server (NPS): Central server to manage and enforce remote access policies in Windows Server.
Examining Remote Access Policy Evaluation
Remote Access Policy Evaluation is the process by which a server assesses incoming remote connection requests against defined access policies to determine if access should be granted or denied.
How It Works (in Windows Server):
Connection Request Received
A user or device attempts to connect remotely (e.g., via VPN, dial-up, RDP).Policy Conditions Checked
User group membership
Day/time restrictions
NAS (Network Access Server) settings
Client IP or device ID
Profile Settings Evaluated
Authentication method (e.g., MS-CHAP v2, EAP)
Encryption levels
Session time limits
Idle timeout
Authorization Decision
Based on conditions and profile, NPS (Network Policy Server) either:Grants access with configured restrictions
Denies the request if conditions are not met
- Following Policy Evaluation Logic
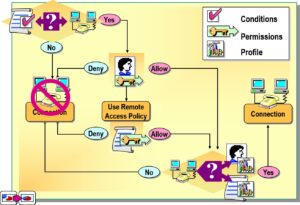
- Examining Default and Multiple Policies
- Default Remote Access Policy
- Native mode (default policy denies all attempts unless User’s account is set to Allow)
- Mixed mode (default policy overridden)
- Multiple Policies
Creating a Remote Access Policy
- Configuring User Dial-in Settings
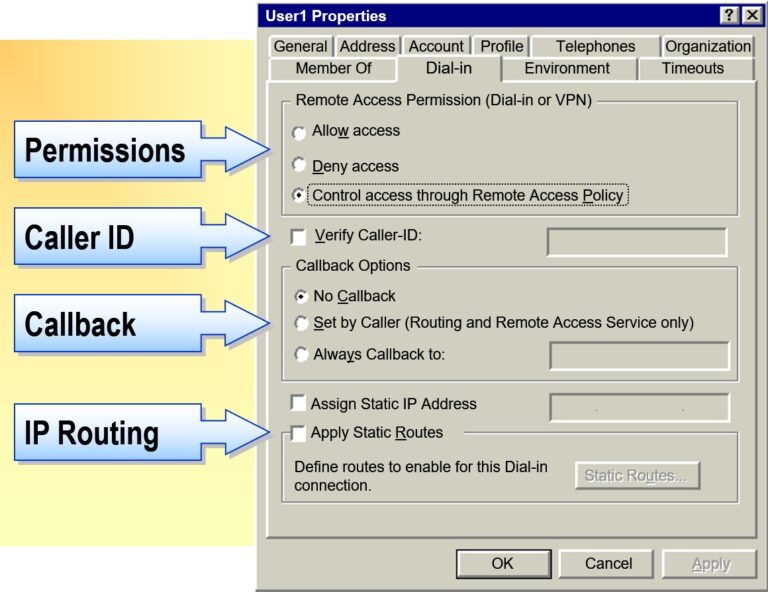
- Configuring Remote Access Policy Conditions
- If the Connection Attempt...
- Is Between 8 A.M.-5 P.M., Monday-Friday
- Is from Any IP Address That Matches 192.168.*.*
- Is from Any User in the Sales Group
- Configuring Remote Access Profile Settings
- Offer the Following...
- 90 Minute Connect Time
- 4 Multilink Lines(line drops if 50% use for 10 minutes)
- Required IPSec Encryption
Implementing Demand-Dial Routing in Windows Server
Demand-Dial Routing enables two routers to connect on-demand over a dial-up or VPN link when there’s data to transmit, making it a cost-effective solution for remote site connectivity.
How to Implement Demand-Dial Routing (Step-by-Step)
✅ 1. Install RRAS (Routing and Remote Access)
Go to Server Manager → Add Roles and Features.
Select Remote Access → Install RRAS and Routing.
✅ 2. Configure RRAS
Open Routing and Remote Access console.
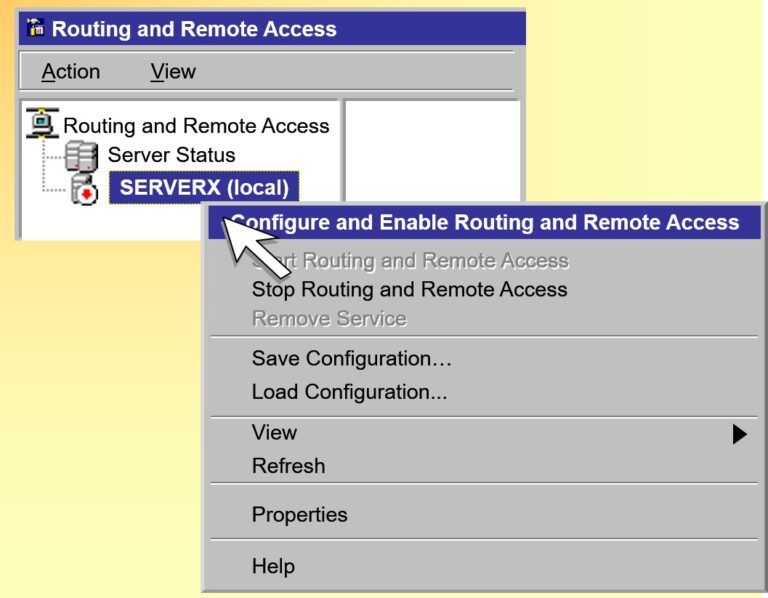
Right-click your server → Configure and Enable Routing and Remote Access.
Choose:
➤ Custom Configuration → Demand-dial routing → Finish.
✅ 3. Create a Demand-Dial Interface
Expand RRAS → Right-click Network Interfaces → New Demand-dial Interface.
Enter a name (e.g., RemoteBranchLink).
Select VPN or modem connection.
Enter the remote VPN server IP/domain.
Configure credentials for authentication.
Choose routing protocols (typically static routes).
✅ 4. Configure Static Routing (Optional but Recommended)
Expand IPv4 → Static Routes.
Add route(s) to the remote subnet using the demand-dial interface.
✅ 5. Set Dial-out Triggers
By default, Windows Server will initiate the connection when traffic matches the destination subnet.
✅ 6. Test the Connection
Send traffic (e.g., ping) to a remote device to trigger dialing.
Use
rrasmgmt.mscor logs to confirm connection success.
- Examining the Role of Connection Sharing
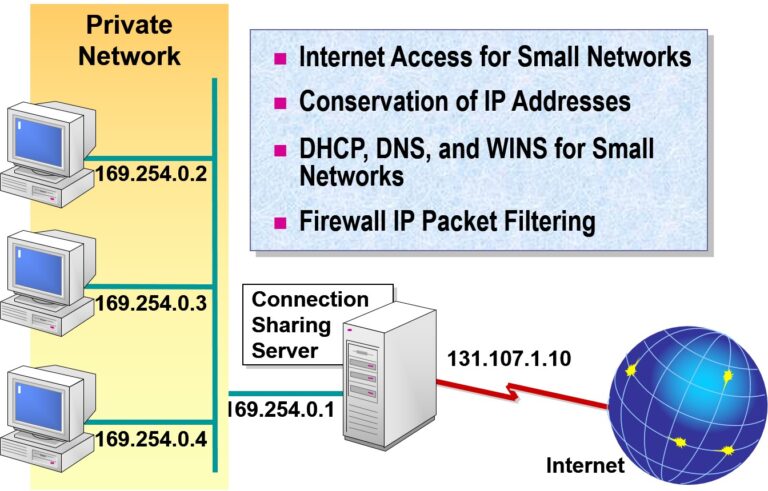
- Configuring Connection Sharing
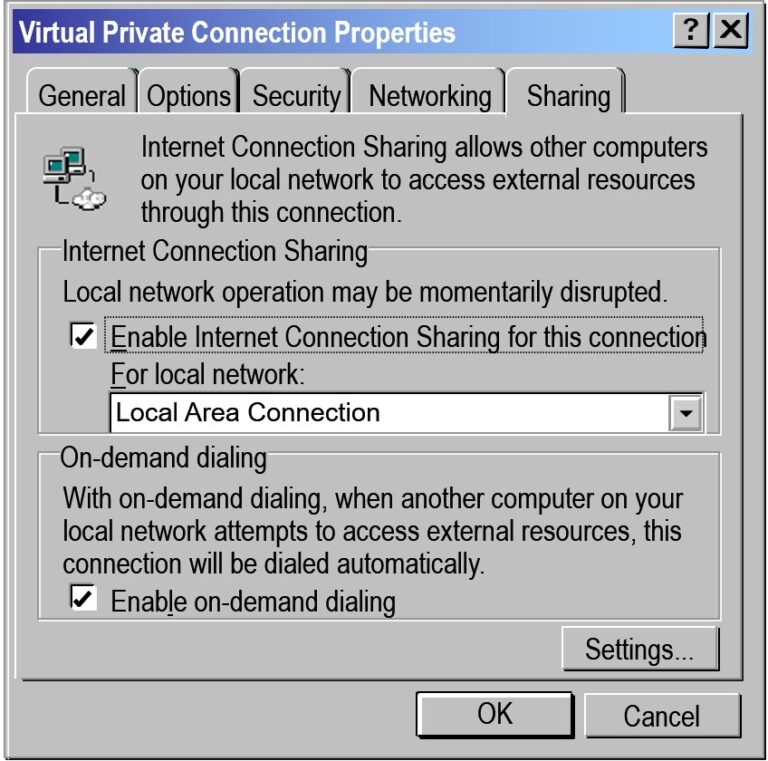
Implementing Connection Sharing in Windows Server
Internet Connection Sharing (ICS) allows a Windows Server to share its internet connection with other devices on a local network. It’s a basic form of NAT (Network Address Translation), commonly used in small or test environments where a full-fledged router isn’t available.
How to Implement Connection Sharing (Step-by-Step)
1. Requirements
A server with two network interfaces:
Internet-facing interface (e.g., Ethernet or VPN)
Internal interface (e.g., LAN to other PCs)
2. Enable ICS on the Internet Interface
Open Network Connections
Control Panel → Network and Sharing Center → Change adapter settingsRight-click the interface connected to the Internet → Properties
Go to the Sharing tab
✅ Check “Allow other network users to connect through this computer’s Internet connection”
From the dropdown, select the internal network interface (the LAN adapter)
Click OK
3. Configure Client PCs
Set the LAN interface on the client machines to obtain an IP automatically
They will receive an IP like
192.168.137.x(default ICS subnet)Gateway and DNS will point to the server’s internal IP
Configuring Network Address Translation (NAT) on Windows Server
Network Address Translation (NAT) allows internal (private) IP addresses to access external (public) networks (like the Internet) by translating private IPs into a single public IP. It’s commonly used in organizations where multiple devices share one public IP address.
Step-by-Step: Configure NAT using RRAS (Routing and Remote Access Service)
Step 1: Install RRAS
Open Server Manager
Go to Manage → Add Roles and Features
Select:
Role-based or feature-based installation
Choose server
Under Server Roles, check Remote Access
Click Next until Role Services
Select:
✅ Routing
Complete installation and restart if prompted.
Step 2: Configure RRAS for NAT
Open Routing and Remote Access from Tools menu in Server Manager
Right-click the server name → Configure and Enable Routing and Remote Access
Select Network address translation (NAT)
Select the public (Internet) interface to be used for NAT
Enable NAT and DNS proxy if required
Click Finish
Step 3: Configure Internal Interface
Right-click “NAT” under IPv4
Click New Interface → choose internal adapter
Select:
✅ “Private interface connected to private network”
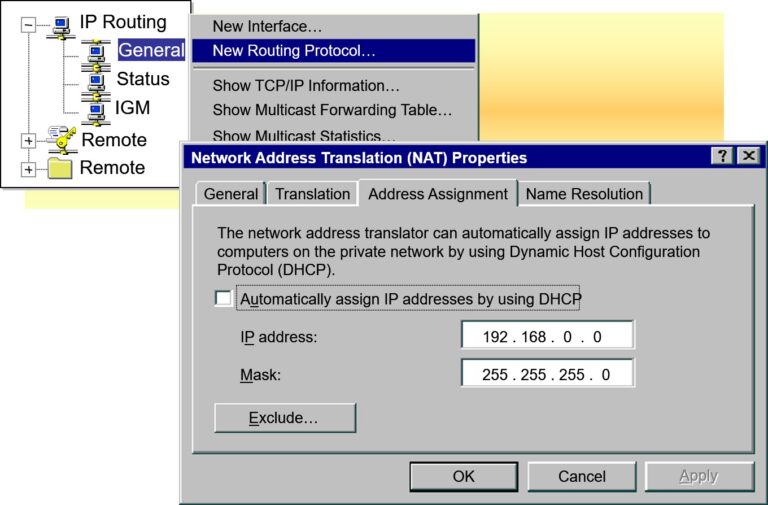
- Examining the Role of Demand-Dial Routing
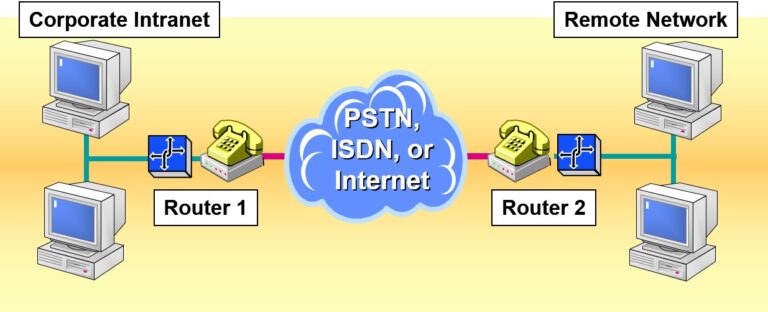
- Configuring a Demand-Dial Router
- Connecting the Router
- Configure a static IP address and subnet mask
- Configure DNS and WINS server addresses
- Configuring Routing and Remote Access
- Start a manually configured Routing and Remote Access server
- Configure a static address pool for incoming demand-dial connections
- Creating a Demand-Dial Interface
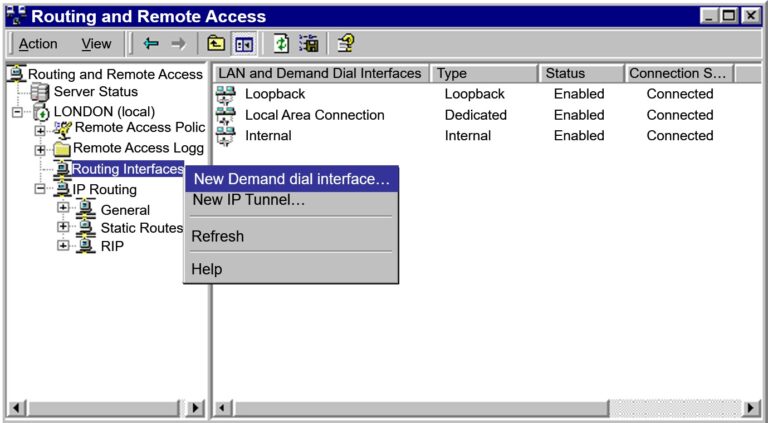
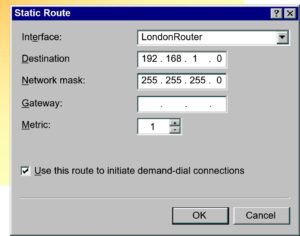
- Configuring Static IP Routes
- Using the change user Command

Add comment