
Module 12: Securing Microsoft Windows Server 2016/2019 – Best Practices & Hardening Guide
Securing the Logon Process in Microsoft Windows Server
Securing the logon process is critical to protect sensitive data, maintain user privacy, and ensure system integrity in enterprise environments. Microsoft Windows Server provides multiple mechanisms to harden and monitor logon activities.
Key Methods to Secure the Logon Process
1. Use of Strong Password Policies
Enforce minimum password length, complexity, and expiration using Group Policy.
Prevent password reuse through password history settings.
2. Enable Account Lockout Policies
Lock user accounts after a certain number of failed login attempts.
Helps prevent brute-force attacks.
3. Implement Two-Factor Authentication (2FA)
Add an additional layer of security using a token-based or app-based authenticator (e.g., Microsoft Authenticator).
Can be implemented via Azure AD or third-party solutions.
4. Use Smart Cards or Windows Hello
Require smart card login or Windows Hello for Business (biometrics or PIN).
Offers stronger authentication than passwords alone.
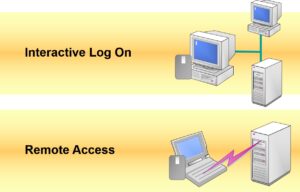
5. Secure the Local Logon Interface
Disable unnecessary user accounts.
Hide last logged-on username via Group Policy (
Interactive logon: Do not display last user name).
6. Control Remote Logon Access
Use Remote Desktop Gateway and restrict RDP access to authorized users only.
Enable Network Level Authentication (NLA) for RDP.
7. Enable Audit Logging
Track all successful and failed logon attempts via Event Viewer (
Securitylogs).Use
Advanced Audit Policy Configurationto customize logon tracking.
- Examining Smart Cards
- Enabling Smart Card Authentication
Securing Desktops and Services by Using Group Policy
Group Policy is a powerful feature in Microsoft Windows Server that allows administrators to define and enforce security configurations across desktops, users, and services in an Active Directory environment.
Key Areas to Secure with Group Policy
1. Account Policies
Enforce strong password rules:
Minimum password length
Password complexity requirements
Maximum password age
Configure account lockout policies to defend against brute-force attacks.
📍 Location:
Computer Configuration > Windows Settings > Security Settings > Account Policies
2. User Rights Assignment
Limit rights such as “Log on locally”, “Access this computer from the network”, and “Shut down the system” to specific groups (e.g., Administrators).
📍 Location:
Computer Configuration > Windows Settings > Security Settings > Local Policies > User Rights Assignment
3. Security Options
Disable unnecessary features like:
Guest account
Anonymous access
LM/NTLM authentication
Enforce UAC (User Account Control) for elevation prompts.
📍 Location:
Computer Configuration > Windows Settings > Security Settings > Local Policies > Security Options
4. Windows Defender Antivirus and Firewall
Turn on and configure:
Real-time protection
Scheduled scans
Automatic updates
Enforce firewall rules to restrict unauthorized access.
📍 Location:
Computer Configuration > Administrative Templates > Windows Components > Microsoft Defender Antivirus
5. Software Restriction Policies / AppLocker
Block or allow software execution by path, publisher, or hash.
Prevent installation of unauthorized apps and executables.
📍 Location:
Computer Configuration > Windows Settings > Security Settings > Application Control Policies
6. Device Restrictions
Restrict use of USB storage and other devices to prevent data leakage.
📍 Location:
Computer Configuration > Administrative Templates > System > Removable Storage Access
7. Desktop & User Interface Lockdown
Remove access to Control Panel, Task Manager, or Command Prompt.
Set screen saver lock and inactivity timeout.
📍 Location:
User Configuration > Administrative Templates > Control PanelUser Configuration > Administrative Templates > System
8. Windows Updates
Force automatic updates installation and restart scheduling to maintain security.
📍 Location:
Computer Configuration > Administrative Templates > Windows Components > Windows Update
9. Logon/Logoff Scripts
Use scripts for automated backups, log collection, or cleanup tasks during login/logout events.
10. Audit Policy
Monitor user activities and detect anomalies:
Logon/logoff
Object access
Policy changes
📍 Location:
Computer Configuration > Advanced Audit Policy Configuration
- Implementing Security Policy

- Modifying Security Settings
- Account Policies
- Local Policies
- Event Log
- Restricted Groups
- System Services
- Registry
- File System
- Public Key Policies
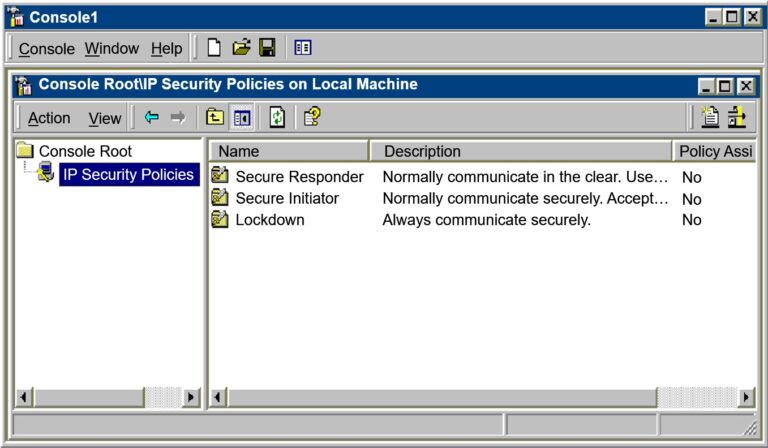
- IP Security Policies
- Using Security Templates

- Creating Security Templates
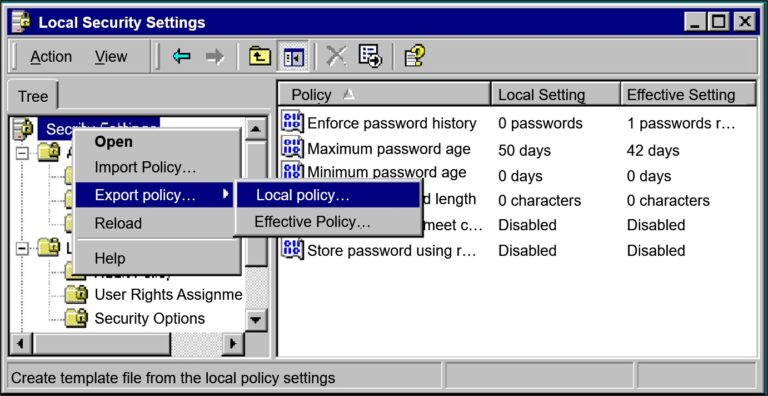
- Analyzing Security
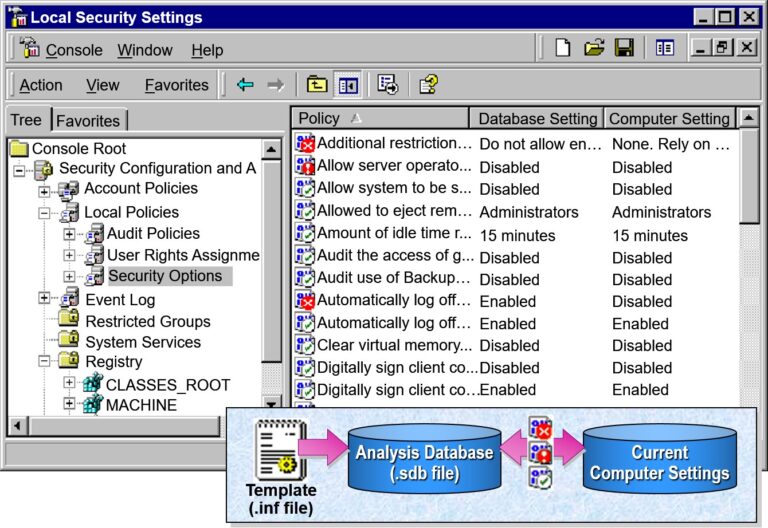
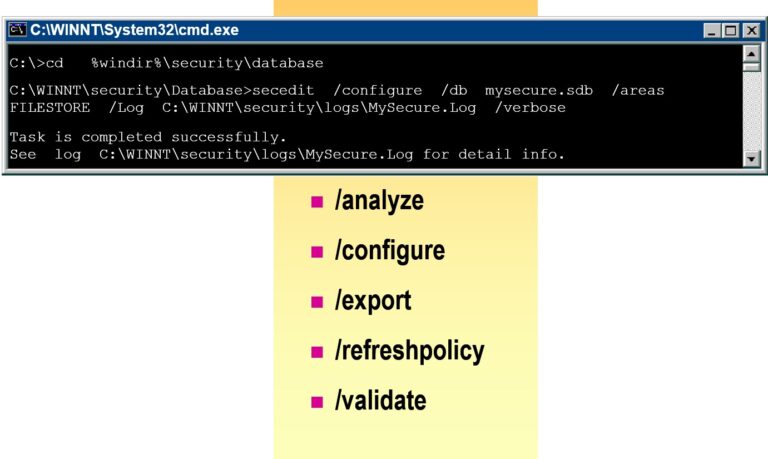
- Configuring and Analyzing Security from a Command Line
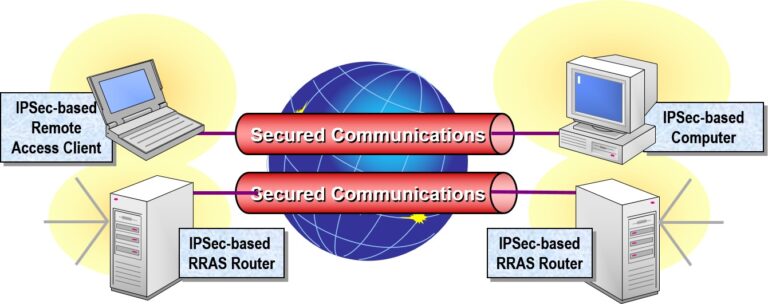
Securing Network Traffic by Using IPSec
IPSec (Internet Protocol Security) is a robust framework used to secure IP network traffic by providing encryption, authentication, and data integrity. It’s especially valuable in enterprise environments where sensitive data needs to be protected over private or public networks.
When to Use IPSec
Secure communication between domain controllers
Protect traffic between branch offices
Enforce server-to-server encryption
Secure remote client connections
Segment sensitive data from general LAN traffic
IPSec Components
Security Associations (SA): Defines how peers communicate securely.
Protocols:
AH (Authentication Header): Provides integrity and authentication.
ESP (Encapsulating Security Payload): Adds encryption + integrity.
Key Exchange:
Uses IKE (Internet Key Exchange) to create secure keys.
How to Configure IPSec in Windows Server
Option 1: Using Windows Firewall with Advanced Security
Open Windows Firewall with Advanced Security
Go to Connection Security Rules
Create a New Rule:
Rule Type: “Custom” or “Server-to-Server”
Authentication Method: Choose Kerberos or Certificates
IP Filter: Specify which computers/networks to secure
Set require encryption or request encryption
Option 2: Using Group Policy (Domain-Wide)
Open Group Policy Management Console
Create or edit a GPO
Navigate to:
Computer Configuration > Windows Settings > Security Settings > Windows Defender Firewall with Advanced Security > Connection Security RulesAdd rules to require IPSec between endpoints
- Examining the Role of IPSec in a Network
- Mutually authenticated, encrypted data transmissions
- Support for public and private key authentication
- Transparent for users
- Administered through Group Policy
- Open industry standard
- Using IPSec to Counter Security Attacks
- ESP Protocol
- Cryptography-based Keys
- Automatic Key Management
- Automatic Security Negotiation
- Network Layer Security
- Mutual Authentication
- IP Packet Filtering
- Examining the IPSec Process

- Configuring IPSec Policies
- Identifying Components of Policy Rules
- Six Components of a Rule
- IP Filter List
- Filter Actions
- Security Methods
- Tunnel Settings
- Authentication Methods
- Connection Types
- Default Response Rule
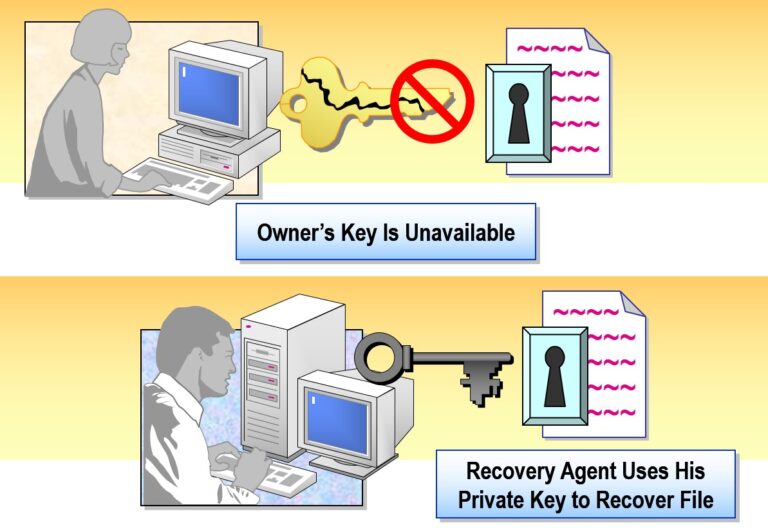
Securing Files Using EFS (Encrypting File System) in Microsoft Windows Server
EFS (Encrypting File System) is a built-in feature in Windows that enables users to encrypt individual files or folders on an NTFS file system. It provides strong protection for sensitive data stored locally on disk, especially against unauthorized access by other users on the same machine.
- What Is EFS?
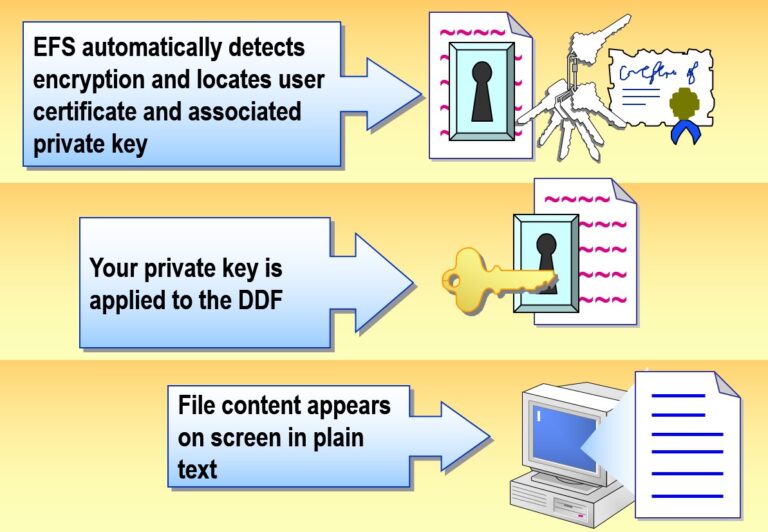
EFS uses public key cryptography to transparently encrypt and decrypt files on the fly. When a user accesses an encrypted file, Windows decrypts it automatically in the background (if they have the proper key).
- Key Features Include:
- Transparent Encryption
- Strong Protection of Encryption Keys
- Integral Data Recovery System
- Secure Temporary and Paging Files
- Encrypting a Folder or File
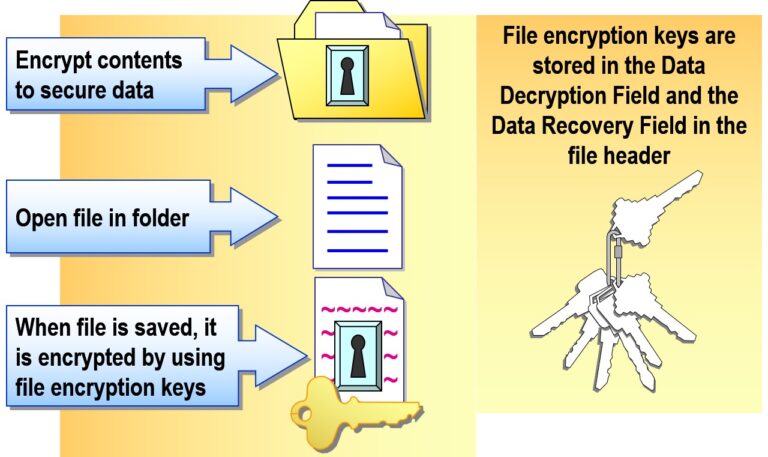
How EFS Works
File Encryption Key (FEK) is generated.
The FEK encrypts the file contents using AES.
The FEK is then encrypted with the user’s public key.
Only the user’s private key can decrypt the FEK and read the file.
- Decrypting a Folder or File
- Using Cipher.exe
- To Encrypt the Test_files Folder
C:\>cipher /e Test_files
- To Encrypt All Files with “cnfdl” in the Name
C:\>cipher /e /s *cnfdl*
- The Format of the cipher Command Is:
cipher[/e|/d][/s:folder_name][/a] [/i][/f][/q][/h][/k][path_name[…]]
- Recovering Encrypted Files
Add comment