Module 14: Managing File Resources & NTFS Permissions in Windows Server 2016/2019
Sharing and Publishing File Resources in Microsoft Windows Server
Sharing and publishing file resources in Windows Server allows administrators to manage access to files and folders across a network efficiently. This process enhances collaboration, security, and data availability.
1. File Sharing
File sharing makes folders or files accessible to users over a network.
How to Share:
Right-click the folder → Properties → Sharing tab
Click “Advanced Sharing” → Check “Share this folder”
Set permissions (Read, Change, Full Control)
Share Permissions vs NTFS Permissions:
Share Permissions: Apply when accessing files over the network.
NTFS Permissions: Apply both locally and over the network.
Effective Permissions = Most restrictive between the two.
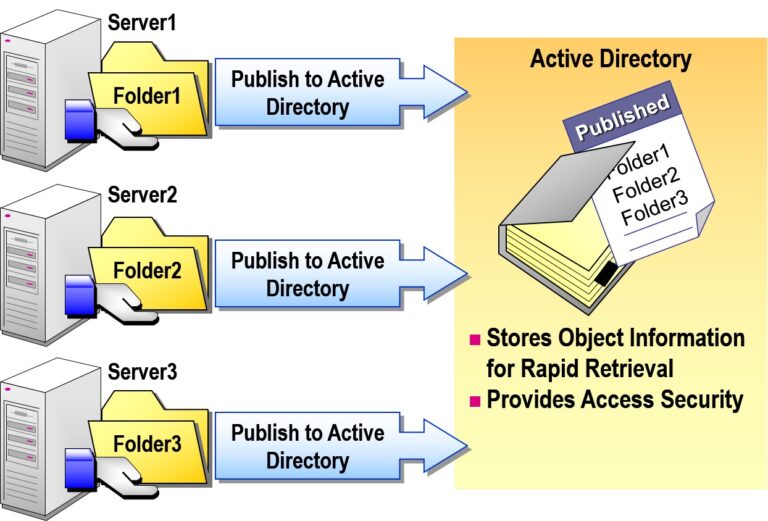
2. Publishing Shared Folders in Active Directory
You can publish shared folders in Active Directory (AD) so users can easily search for them.
Steps to Publish:
Open Active Directory Users and Computers
Right-click the relevant OU → New → Shared Folder
Provide the folder’s UNC path (e.g.,
\\ServerName\SharedFolder)Add a meaningful description for users
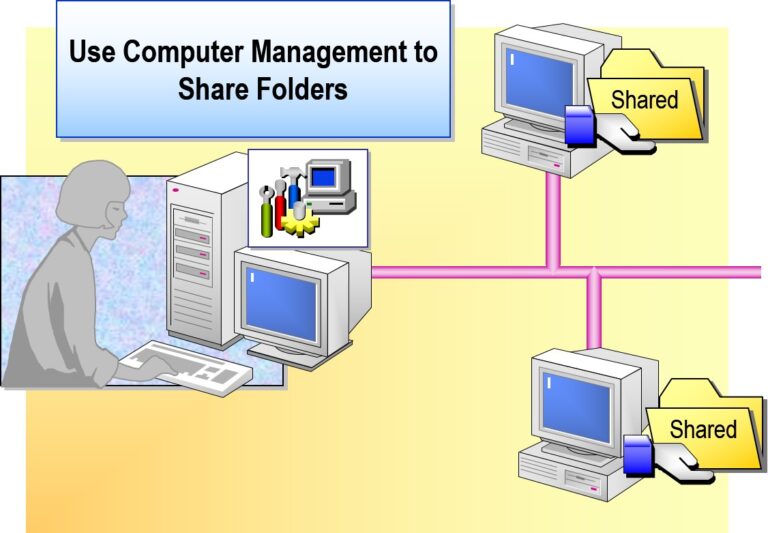
- Sharing a Folder
- Publishing a Folder in Active Directory Users and Computers
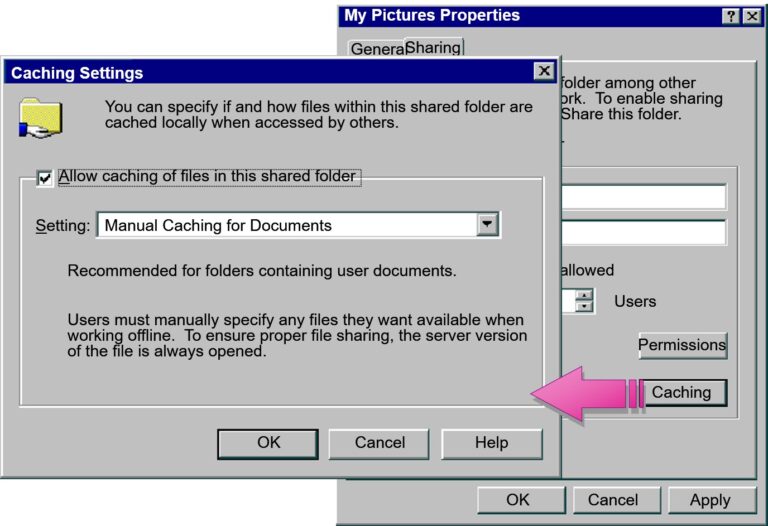
- Implementing Offline Files
Creating a Distributed File System (DFS) in Microsoft Windows Server
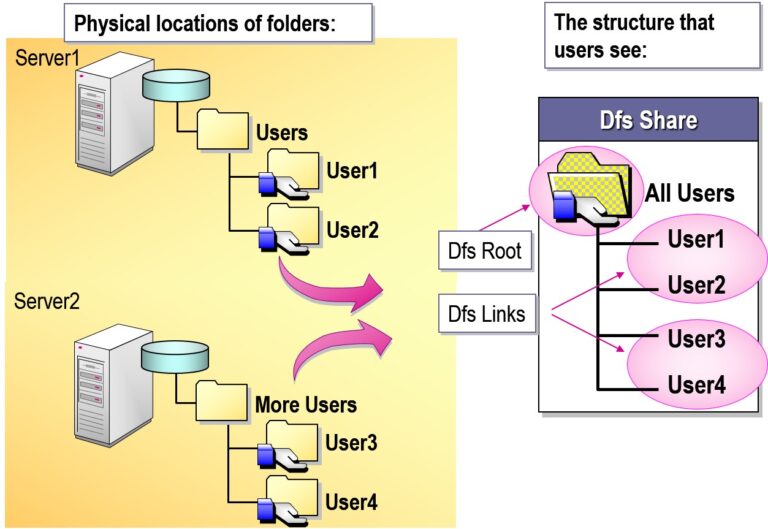
Distributed File System (DFS) in Windows Server provides a way to organize shared folders located on different servers into one or more logically structured namespaces. It simplifies access, improves availability, and supports replication across sites.
DFS Components
DFS Namespace:
Virtual view of shared folders (e.g.,\\domain.local\Public) — users don’t need to know the actual server path.DFS Replication (DFS-R):
Keeps folders synchronized across multiple servers using a multi-master replication engine.
Step-by-Step: Create a DFS Namespace
Prerequisites:
Windows Server (2012/2016/2019/2022)
File Server role and DFS Namespaces feature installed
✅ 1. Install DFS Role
Via Server Manager:
Add Roles and Features → File and Storage Services → File and iSCSI Services → DFS Namespaces
2. Open DFS Management
Go to:
Server Manager→ Tools → DFS Management
✅ 3. Create New Namespace
Right-click on “Namespaces” → New Namespace
Enter the host server name
Give a Namespace Name (e.g.,
PublicFiles)Choose Domain-based namespace for scalability and fault tolerance
Finish the wizard
You now have:
\\domain.local\PublicFiles
✅ 4. Add Folders to Namespace
Right-click the namespace → New Folder
Add the target location(s):
e.g.,\\Server1\DeptFilesand\\Server2\DeptFiles
- What Is Dfs?
- Setting Up a Dfs Root
- Setting Up a Stand-Alone Dfs Root
- Setting Up a Domain Dfs Root
- Setting Up Dfs Link
Option
Link name
Send the user to this network path
Comment
Clients cache this Dfs referral for x seconds
Description
Specify the name users will see when they connect to Dfs
Specify the UNC name for shared folder location
Add optional information for shared folder
Add optional information for shared folder
Exploring NTFS Permissions in Microsoft Windows Server
NTFS (New Technology File System) permissions are a core feature in Windows that help control access to files and folders on NTFS-formatted volumes. They provide fine-grained control over who can read, write, modify, or delete data.
How to View/Edit NTFS Permissions
Right-click file/folder → Properties
Go to Security tab
Click Edit to add/remove users or change permissions
Click Advanced for:
Auditing
Ownership
Inherited permissions
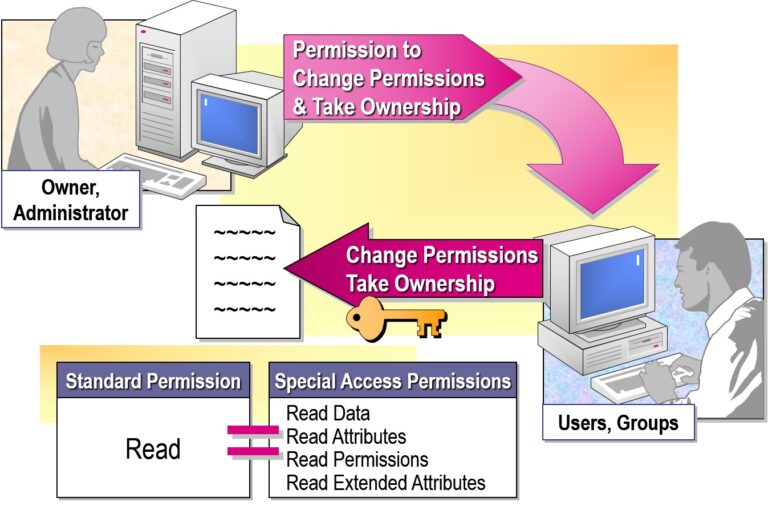
- What Are Special Access Permissions?
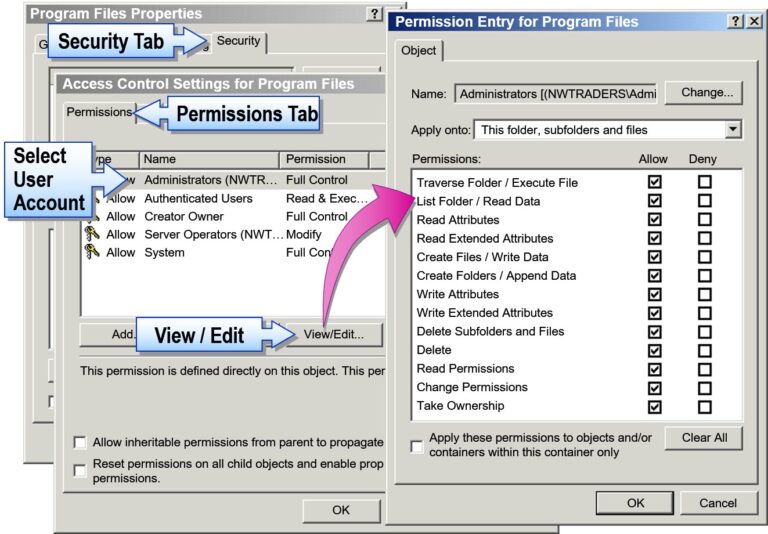
- Granting Special Access Permissions
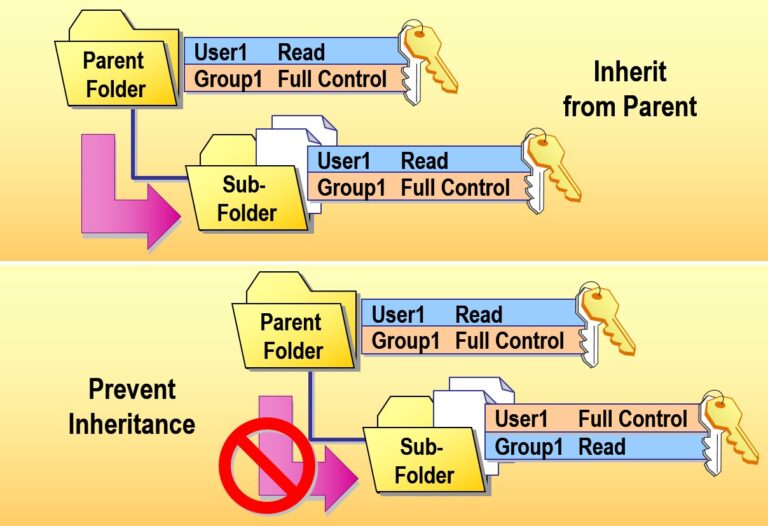
- Managing Permission Inheritance
Managing Disk Quotas in Microsoft Windows Server
Disk Quotas are a feature of the NTFS file system that allows administrators to limit the amount of disk space users can use on a volume. This helps prevent a single user from consuming all available disk space.
Why Use Disk Quotas?
Prevent excessive disk usage by users
Improve storage planning and management
Set limits per user on a per-volume basis
Monitor and log usage for audit or compliance
How to Enable Disk Quotas (Step-by-Step)
Open File Explorer → Right-click the NTFS volume → Select Properties
Go to the Quota tab
Click Show Quota Settings
Check Enable quota management
Optionally check:
Deny disk space to users exceeding quota limit
Log event when a user exceeds their quota limit
Set Default quota limit and Warning level
Apply and close the settings
- Using Disk Quotas
- Usage Calculation Based on File and Folder Ownership
- Compression Ignored When Calculating Usage
- Free Space for Applications Based on Quota Limit
- Disk Quotas Tracked for Each NTFS Volume
- Disk Quotas Available Only on NTFS Volumes
- Setting Disk Quotas
Option
Enable quota management
Deny disk space to users exceeding quota limit
Do not limit disk usage
Limit disk space to
Set warning level to
Quota Entries
Option
Enable disk quota management
Users cannot write to volume when they exceed their hard disk space allocation
No disk space limit for users
Specify amount of disk space users can use
Specify amount of disk space users can fill before event is logged
Add entries, delete entries, view properties for entries
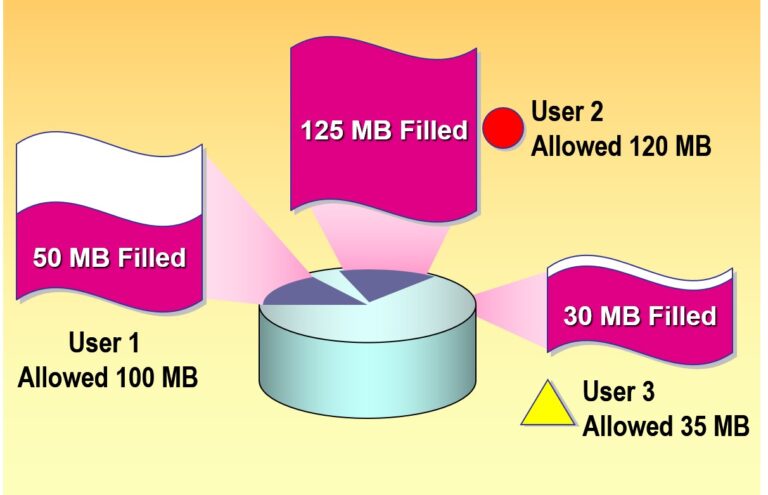
- Monitoring Disk Quotas

Add comment