Module 15: Performing Disk Management in Windows Server 2016/2019
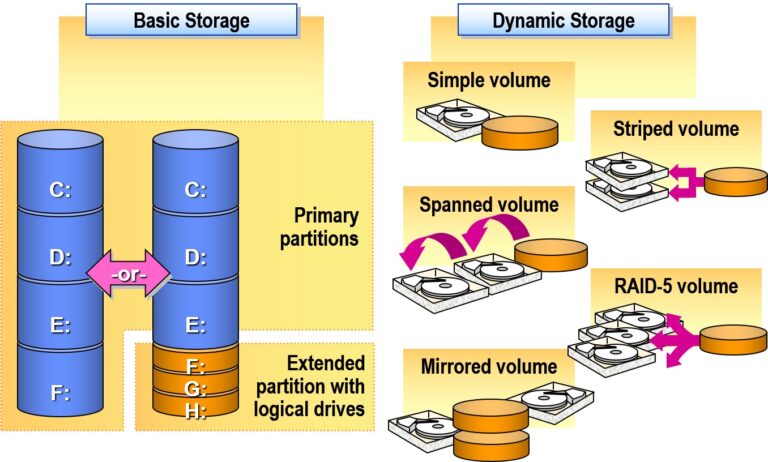
Windows Disk Storage Types (Windows Server & Client OS)
Windows supports several disk storage types, each designed for different performance, reliability, and configuration needs. Here’s a breakdown of the most commonly used:
1. Basic Disks
Most common and default type
Uses partitions: Primary, Extended, Logical
Supports MBR or GPT
Simple to manage, compatible across systems
✅ Best for: Standard desktops, simple servers
2. Dynamic Disks
More advanced storage capabilities
Uses volumes instead of partitions
Supports:
Simple Volumes
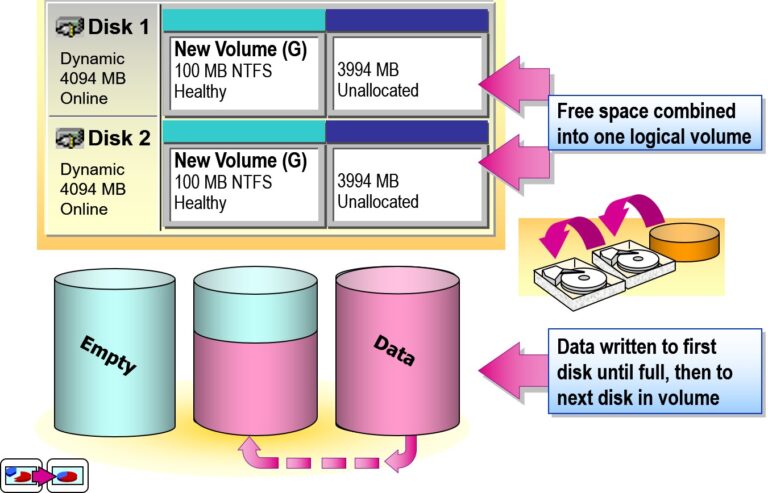
Spanned Volumes
Striped Volumes (RAID 0)
Mirrored Volumes (RAID 1)
RAID-5 Volumes (Windows Server only)
✅ Best for: Advanced storage needs, redundancy, performance
3. GPT (GUID Partition Table)
Modern replacement for MBR
Supports disks larger than 2TB
Up to 128 partitions per disk (no extended/logical needed)
Required for UEFI boot
✅ Best for: Modern servers, large drives
4. MBR (Master Boot Record)
Traditional partitioning style
Supports up to 2TB disk size
Only 4 primary partitions (or 3 primary + 1 extended)
✅ Best for: Legacy systems
5. Storage Spaces
Virtualizes storage into pools
Supports:
Simple (No resiliency)
Mirror (2-way/3-way redundancy)
Parity (similar to RAID-5)
✅ Best for: Fault-tolerant storage with flexible expansion
6. ReFS (Resilient File System)
Modern alternative to NTFS (available in Windows Server)
Built-in integrity checking and automatic repair
Designed for high-availability and data integrity
✅ Best for: File servers, virtualized workloads
Using Disk Management in Windows Server & Client
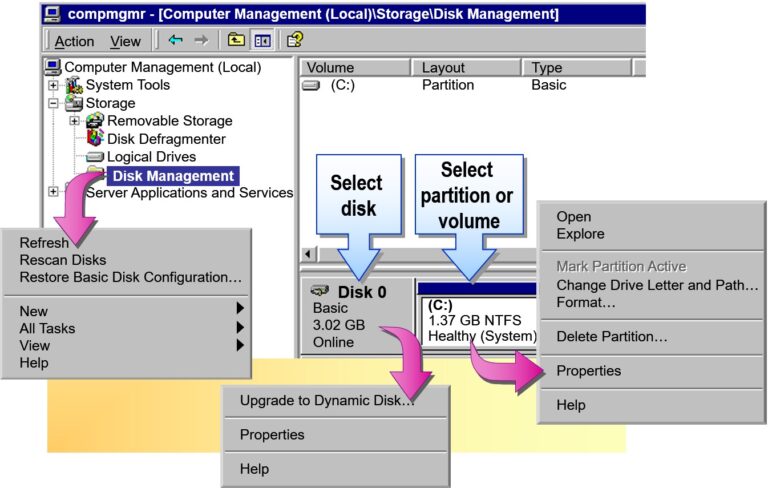
Disk Management is a built-in Windows utility used for managing hard drives, partitions, and volumes. It provides a graphical interface for performing basic and advanced storage tasks.
How to Open Disk Management
Right-click on Start Menu → Select Disk Management
OR
PressWindows + R, typediskmgmt.msc, and press Enter
✅ Common Tasks with Disk Management
1. View Disk Information
See all connected drives, partitions, sizes, health status
Visual layout of disk usage and file systems
2. Create a New Partition
Right-click Unallocated Space → New Simple Volume
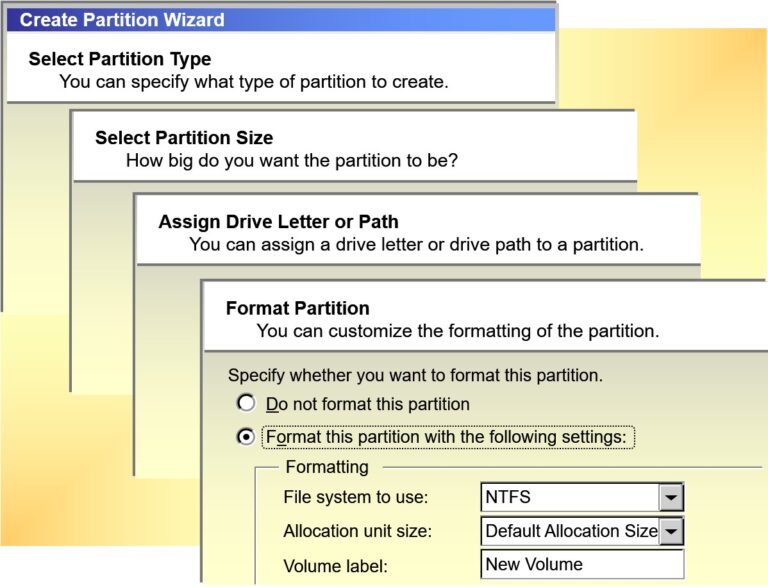
Follow the wizard to assign a letter, format (NTFS), and label
3. Extend a Partition
Right-click a volume with unallocated space next to it → Extend Volume
4. Shrink a Volume
Right-click a volume → Shrink Volume
Enter the amount to shrink (MB)
5. Delete a Partition
Right-click the volume → Delete Volume
⚠️ All data on the partition will be lost
6. Change Drive Letter
Right-click volume → Change Drive Letter and Paths
7. Mark Partition as Active
Used for system boot partitions (usually only for MBR disks)
Advanced Features (Server Focused)
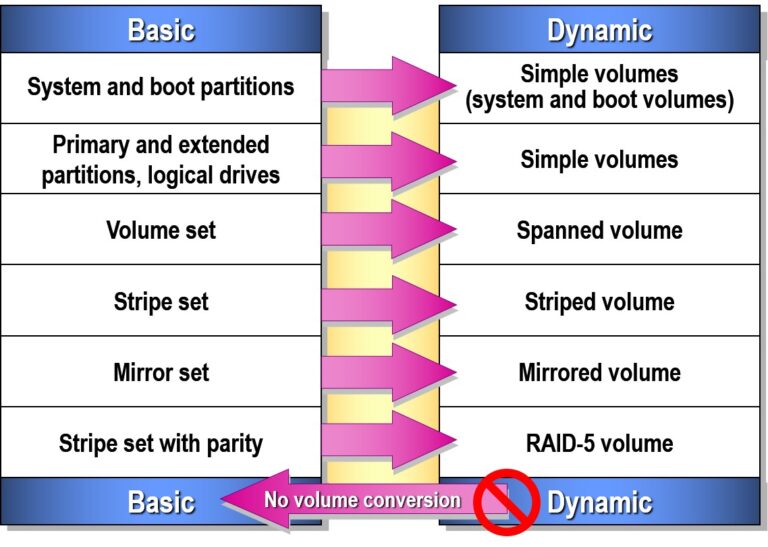
Convert Basic Disk to Dynamic Disk for creating spanned, striped, mirrored volumes
Convert to GPT or MBR (only on empty/uninitialized disks)
Create RAID volumes (in server editions)
Creating Dynamic Volumes
Dynamic volumes allow you to create advanced storage configurations like spanned, striped (RAID-0), mirrored (RAID-1), and RAID-5 volumes across one or multiple disks. This is especially useful in enterprise and server environments.
Steps to Create a Dynamic Volume
Prerequisites:
At least one basic disk with unallocated space
To create striped/mirrored/RAID-5 volumes, multiple dynamic disks are required
Step 1: Convert Basic Disk to Dynamic
Open Disk Management (
diskmgmt.msc)Right-click the disk (e.g., “Disk 1”) → Select Convert to Dynamic Disk
Select the disks to convert → Click OK
Step 2: Create a New Dynamic Volume
Right-click unallocated space on a dynamic disk
Choose one of the following:
New Simple Volume
New Spanned Volume
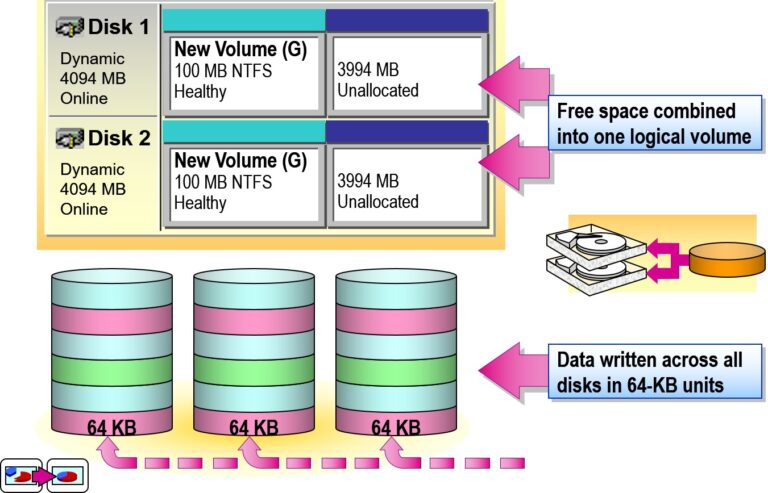
New Striped Volume
New Mirrored Volume (only available on Server/Pro)
New RAID-5 Volume (Windows Server only)
Follow the wizard:
Select disks (if needed)
Assign drive letter
Format volume (usually NTFS)
- Converting Storage Type
- Creating and Extending Simple Volumes
- Simple Volumes:
- Contain Space on a Single Disk
- Can Use NTFS, FAT, or FAT32
- Can Be Mirrored
- Are Created with the Create Volume Wizard
- Can Be Extended if Formatted as NTFS
- Creating and Extending Spanned Volumes
- Creating Striped Volumes
Performing Common Disk Management Tasks in Windows Server
Disk management is a vital part of system administration. It ensures data storage is efficiently structured, secure, and scalable. Below are key tasks every IT admin should know:
1. Viewing Disk Configuration
Open Disk Management (
diskmgmt.msc)View all physical and virtual disks, partitions, and volumes
2. Creating a New Partition / Volume
Steps:
Right-click on unallocated space
Select New Simple Volume
Follow the wizard to assign a drive letter and format (typically NTFS)
3. Formatting a Volume
Use when:
Preparing a new disk
Erasing old data
Steps:
Right-click on the volume → Format
Choose file system (NTFS/exFAT), allocation unit size, and label
4. Changing a Drive Letter
Useful for:
Resolving conflicts
Organizing storage for users
Steps:
Right-click on the volume → Change Drive Letter and Paths
Click Change, then assign a new letter
5. Shrinking a Volume
Used to free space for creating new partitions
Steps:
Right-click the volume → Shrink Volume
Enter amount to shrink in MB
6. Extending a Volume
Used to increase space using unallocated area
Steps:
Right-click the volume → Extend Volume
Follow the wizard and select available unallocated space
7. Converting a Disk Type
Basic to Dynamic: Enables advanced volume types (e.g., spanned, mirrored)
MBR to GPT: Required for >2TB disks or UEFI boot
⚠️ Note: Conversions may cause data loss—backup first.
8. Checking Disk Health
Run chkdsk via CMD:
chkdsk C: /f /r
Or use PowerShell:
Get-PhysicalDisk | Get-StorageHealthReport
9. Managing Disk Quotas
Restrict user storage per volume:
Right-click drive → Properties
Go to Quota tab → Enable and configure limits
10. Using Disk Cleanup
Remove temp files and system junk:
cleanmgr
Or use Storage Sense in modern Windows Server editions.
- Creating Partitions
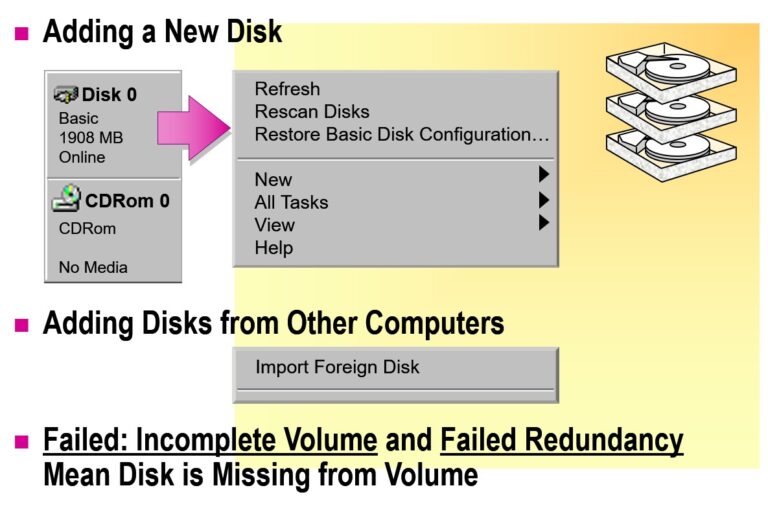
- Adding Disks
- Managing Drive Letters and Paths
- Managing Drive Letters
- Add—to assign a new drive letter
- Remove—to remove an existing drive letter
- Modify—to change an existing drive letter
- Managing Drive Paths
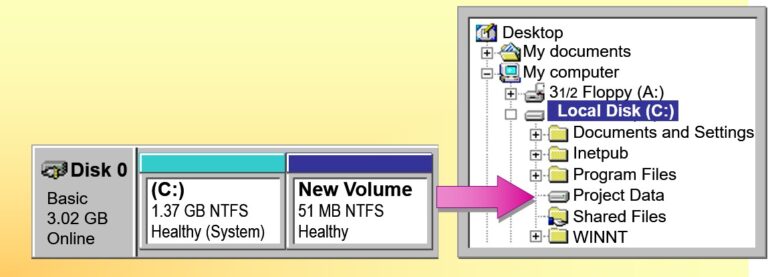
- Managing Drive Letters and Paths
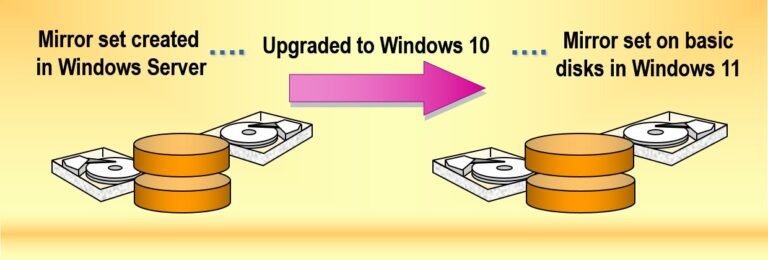
- Repairing a Mirror Set
- Resynchronizing Mirror Sets
- Breaking Mirror Sets
- Deleting Mirror Sets
- Managing Other Sets on Basic Disks
- Deleting Volume Sets and Stripe Sets
- Deleting a volume set or stripe set deletes all of the data that the set contains
- You can delete entire sets only
- Repairing and Deleting Stripe Sets with Parity
- Repairing a stripe set with parity requires additional basic disk with sufficient free space
- Deleting a stripe set with parity deletes all data that the set contains
- You can delete entire stripe set with parity only
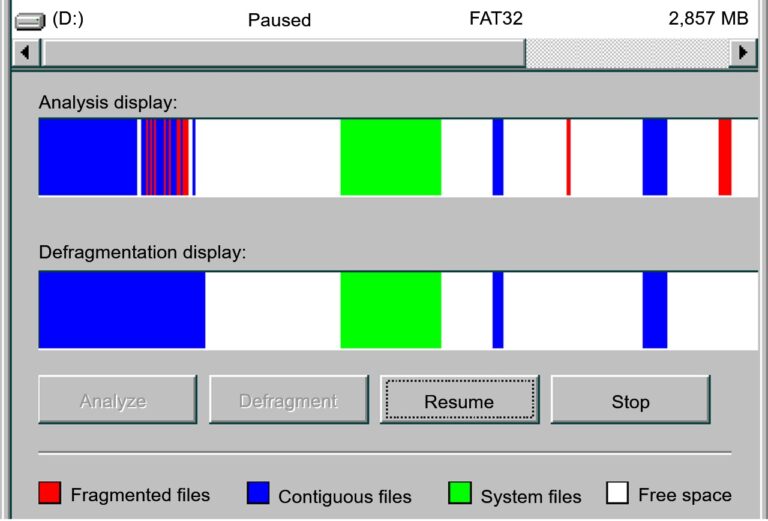
- Defragmenting Hard Disks

Add comment